
Israel Invoices 2026 — Invoice Allocation Numbers Explained
Israel Invoices 2026
Israel Invoices from 1.6.2026: every invoice over 5,000 ₪ requires an allocation number
Starting June 1, 2026, the reporting threshold for Israel Invoices drops from 20,000 ₪ to 5,000 ₪ before VAT. Every tax invoice above that threshold must carry a valid allocation number issued directly by the Israel Tax Authority (ITA) — otherwise the customer will not be able to deduct the VAT as input tax.
What is an "allocation number" and why does it matter?
An allocation number is a "digital stamp" that the Israel Tax Authority issues for every tax invoice reported to it in real time, through the "Israel Invoices" system. The purpose of the model is to reduce fictitious invoices in Israel: every transaction reported receives a unique allocation number, and deducting input VAT is allowed only if the invoice carries a valid number.
Without a valid allocation number, the invoice is still a legally valid document — but the customer will not be able to deduct the VAT on their VAT return. This makes the allocation number critical from a business standpoint: suppliers who don't issue invoices with allocation numbers will end up with unhappy customers.
Timeline of the model
The Israel Tax Authority rolled out the model in stages, lowering the threshold at each step:
- 2024: threshold 25,000 ₪
- 2025: threshold 20,000 ₪
- From 1.1.2026: threshold 10,000 ₪
- From 1.6.2026: threshold 5,000 ₪ (before VAT) — the new threshold
At each stage, more and more businesses fall under the reporting requirement. The new threshold (5,000 ₪) covers almost all standard business invoices.
Which invoices does this apply to?
- Requires an allocation number: tax invoices whose amount before VAT is over 5,000 ₪.
- Exempt: invoices under the threshold, receipts (not tax invoices), invoices with no VAT.
- Credit invoice above the threshold: also requires an allocation number (for the buyer's VAT offset).
The process, in short
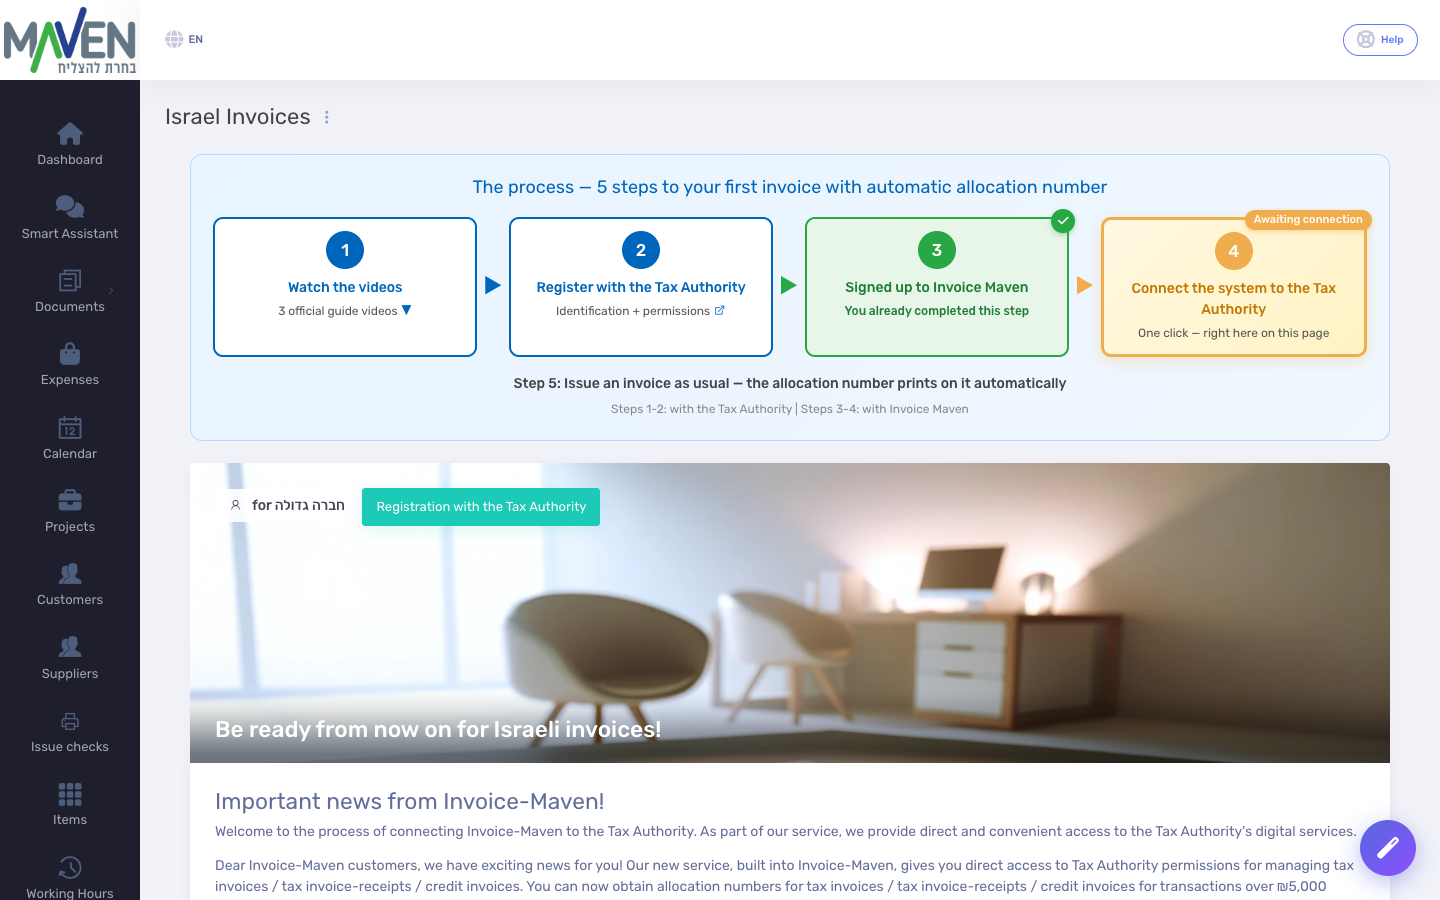
5 steps to your first invoice with an automatic allocation number:
- Step 1: Watch the Israel Tax Authority's videos — 3 official instructional videos
- Step 2: Register with the Israel Tax Authority — identification + permissions
- Step 3: Register with Invoice Maven — if you haven't already
- Step 4: Connect your system to the Israel Tax Authority — one click from inside Invoice Maven
- Step 5: Issue a regular invoice — the allocation number will be printed on it automatically 🎉
Steps 1–2: with the Israel Tax Authority | Steps 3–4: with Invoice Maven
How to prepare (2 steps)
Note: Anyone who hasn't yet completed step A (registering for the Tax Authority's digital services) must do so before 1.6.2026, otherwise you won't be able to issue invoices above the threshold.
Step A: Register for the Israel Tax Authority's digital services
If you haven't registered yet, go to the Israel Tax Authority's digital services portal and set up a digital identity. This is a one-time action that lets every invoicing system (including Invoice Maven) interface automatically with the Tax Authority on your behalf.
Link: secapp.taxes.gov.il – Digital Services
Important for limited companies and partnerships: personal identification alone is not enough. You also need the company to grant permission for digital actions to the user who will actually issue the invoices, and that same user needs to receive/approve the permission. Skipping these steps is the most common cause of error 406 when requesting an allocation number. See the 3 videos further down this page.
Step B: Getting an allocation number
Once you've completed Step A, there are two ways to get an allocation number:
- Automatically, through Invoice Maven (recommended): once your system is connected to the Tax Authority, whenever you issue an invoice above the threshold, the system sends a request to the Tax Authority, receives the allocation number, and prints it on the invoice automatically. Nothing manual to do.
- Manually, on the Israel Tax Authority's website: if at some point the interface isn't working (a Tax Authority glitch, a lost connection, etc.), you can log in to their site, request an allocation number for a specific transaction, and then enter it manually on the invoice in the system.
What if the allocation request fails?
Sometimes the Tax Authority returns an error (for example: a network error, an invalid VAT charge, an expired digital identity). In that case:
- Issue the invoice as usual in the system.
- Request an allocation number manually on the Tax Authority's website (Step B above).
- Go back to the invoice in the system, enter the number manually in the "Allocation Number" field, and send it to the customer.
Tip: Don't leave the customer without an allocation number. Even if you're short on time, it's better to delay sending the invoice by a few minutes than to send a "broken" invoice that the customer can't deduct VAT from.
What should suppliers do?
- Make sure you're registered for the Israel Tax Authority's digital services (Step A).
- Check that your system is connected to the Tax Authority — in Invoice Maven this is done under Business Settings → Israel Invoices.
- Issue a regular tax invoice — if the amount is above 5,000 ₪, the system will handle the allocation automatically.
- If an invoice is printed without an allocation number — don't send it to the customer. Check the connection and re-issue it.
What should customers (buyers of goods/services) do?
- Always require that an invoice you receive from a supplier includes a valid allocation number — this is a condition for deducting your VAT.
- An invoice without an allocation number above the threshold means you will not be able to deduct the VAT.
- Recording the invoice in your own bookkeeping system is done as usual — the number appears on the body of the invoice.
Video guides — setting up permissions with the Israel Tax Authority
To receive allocation numbers for invoices, you need to set up, with the Israel Tax Authority, both personal identification and permission for digital actions. Follow the three steps in order:
Note: Steps 2 and 3 are mandatory for a limited company and a partnership. Skipping them is the most common cause of error 406 when requesting an allocation number. A self-employed business (עוסק מורשה) or exempt dealer (עוסק פטור) should still go through Step 1 (at minimum).
Important — your responsibility toward the Israel Tax Authority: The registration and permission-granting process takes place on the Israel Tax Authority's own website — not inside Invoice Maven. We cannot perform it for you, and we have no direct control over whether or when it completes. After you finish registering, you may run into delays or errors on the Tax Authority's side — for example, a permission that takes time to update in their systems, errors on the Tax Authority's website that are beyond our control, or additional security checks performed by them. In such cases, contact the Israel Tax Authority support directly: *4954 or 02-5656400, email mokedreshut@taxes.gov.il. Once the permission is fully approved at the Tax Authority, the connection to Invoice Maven will work automatically.
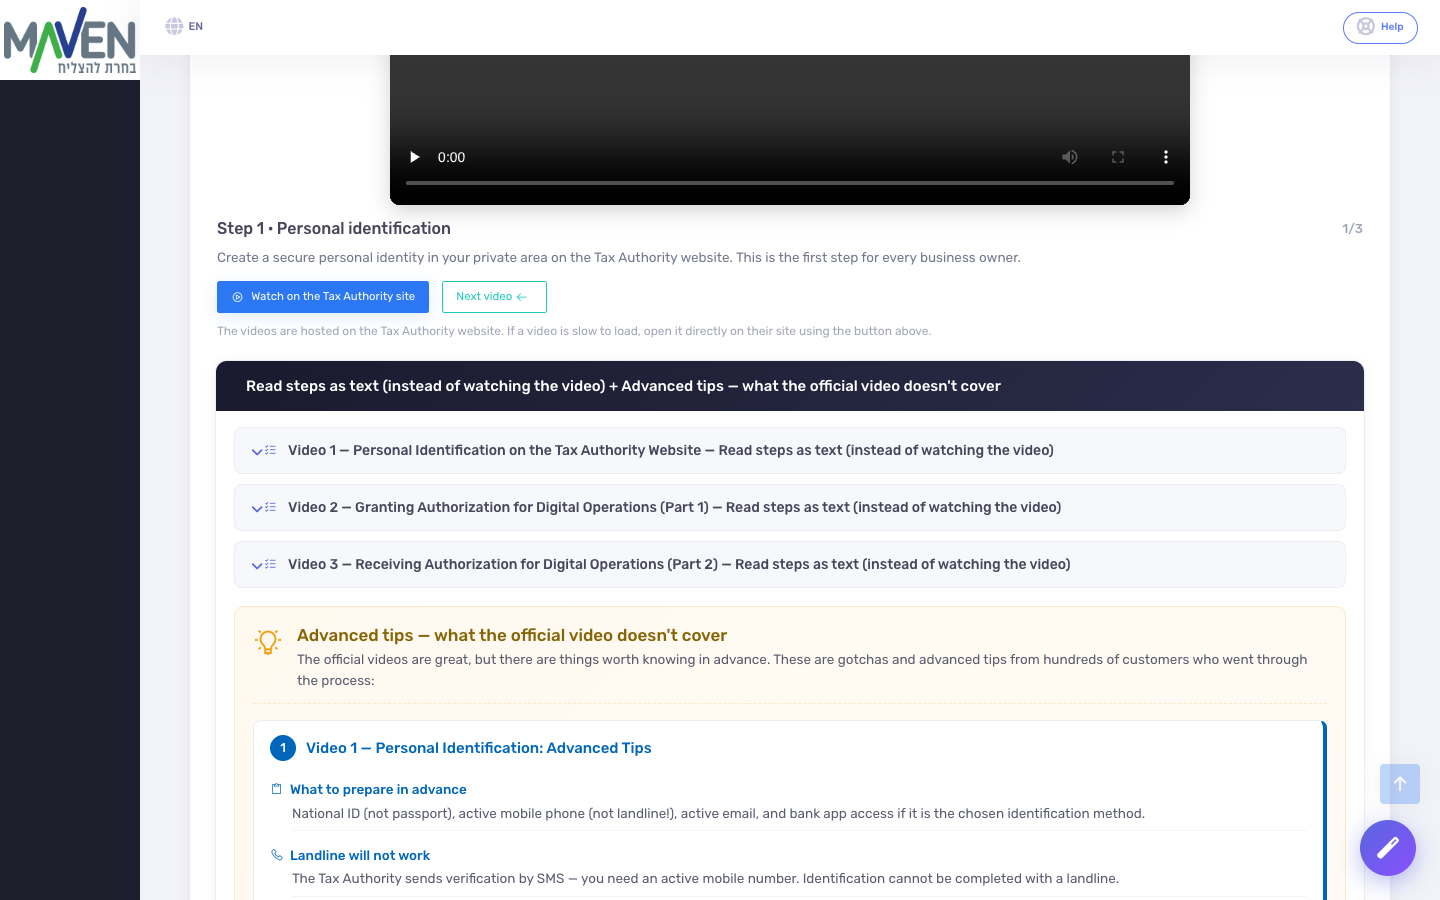
Step 1 · Personal identification
The first step for every business owner — creating a personal identification in your personal area on the Israel Tax Authority's website.
Official Israel Tax Authority video — narrated in Hebrew. The step-by-step text below covers the same content in English.
Steps as text (instead of watching the video)
- Go to the Israel Tax Authority website: secapp.taxes.gov.il
- Click "Register for the personal area" if this is your first time, or "Login" if you've registered before
- Enter your ID number (Teudat Zehut) in the relevant field
- Choose an identification method: SMS to your phone, banking app, or national identification
- Complete the identification using the method you chose — SMS code / bank-app confirmation / national identification
- Create a strong password for the personal area (per the instructions on the site)
- Verify your email address using the code sent to you
- You're now in the personal area — identification is complete. Move on to Step 2 if you're a limited company (Ltd.) or a partnership.
Step 2 · Granting permission for digital actions (part A)
Essential for a limited company (Ltd.) and a partnership. Granting a user permission to act on behalf of the company. Skipping this step is the most common cause of error 406 when requesting an allocation number.
Official Israel Tax Authority video — narrated in Hebrew. The step-by-step text below covers the same content in English.
Steps as text (instead of watching the video)
- Go to go.gov.il/Hasmacha — the Israel Tax Authority's authorization area
- Log in with your personal identification (created in Step 1)
- Choose "Grant permission for a digital action"
- Choose your entity (limited company, partnership, or non-profit)
- Choose the permission type: "Digital actions for external software"
- Enter the ID number of the user who will receive the permission — this can be you yourself
- Define the scope of the permission: choose "Israel Invoices" (and any other action you want)
- Confirm and submit. The user will receive a notice that the permission is pending approval — they need to continue to Step 3.
Step 3 · Receiving permission for digital actions (part B)
Completing the permission approval by the user who received it. All steps must be completed — otherwise the permission never takes effect.
Official Israel Tax Authority video — narrated in Hebrew. The step-by-step text below covers the same content in English.
Steps as text (instead of watching the video)
- The user who received the permission (not the one who granted it) logs in to go.gov.il/Hasmacha
- Logs in with their own personal identification
- Chooses "Permissions pending approval" or "Receive permission"
- Chooses the specific permission that was granted to them (marked "pending")
- Reviews the details: who granted the permission, what scope, which entity
- Clicks "Approve" or "Receive permission"
- Receives a confirmation notice — the permission is now active. You can return to Invoice Maven and connect your system to the Tax Authority.
Advanced tips — what the official video doesn't cover
The Israel Tax Authority's videos are great, but there are a few things worth knowing in advance. These are the "gotchas" and advanced tips from hundreds of customers who went through this process:
Tips for Step 1 — Personal identification
What to prepare in advance: your ID card (not a passport), an active mobile phone number (not a landline!), an active email address, and access to your banking app if that's your identification method.
A landline won't work: the Tax Authority sends a verification code by SMS — you need access to an active mobile number. A landline cannot complete the identification.
SMS code not arriving? Wait 2 minutes before requesting it again. If it still doesn't arrive — check that your mobile number is up to date with the Tax Authority.
The banking app — the fastest option: if you chose identification through your bank, confirmation happens in the app within 2 seconds, no SMS needed. This is the recommended method.
Password requirements: minimum 8 characters, an uppercase letter + a lowercase letter + a number + a special character (!@#$ etc.).
Tips for Step 2 — Granting permission
Permission validity: choose "no expiration date" — otherwise you'll need to renew the permission itself every X months. The connection itself (from Invoice Maven to the Tax Authority) already renews automatically every 3 months.
Permission scope — check everything: check all related actions: "issue allocation number," "cancel allocation number," "view invoices." Checking only some of them causes problems later on.
Multiple users: you can add more than one user to the same permission — useful for businesses that issue invoices across shifts, or for an accounting department with several team members.
Granting permission to yourself: if you're both the company owner and the one issuing invoices — you can grant yourself the permission. You'll still need to go through Step 3 to approve it. That's not a mistake, it's the process.
Partnerships: if you're a sole partner representing the partnership — enter your own ID number as the representative, but choose the partnership entity (not your ID as a self-employed business).
Tips for Step 3 — Receiving permission
The correct address: receiving the permission happens on the same site as Step 2 — go.gov.il/Hasmacha. Not on the Tax Authority's main portal. People get confused and go to the wrong place.
Email notification: the notification link in the email is valid for 30 days only. After that, you need to log in manually to go.gov.il/Hasmacha and look for the pending permission.
Slow to update: sometimes the permission still shows as "pending approval" even after you've approved it. Wait 5–10 minutes and refresh the page before contacting support.
Safari / iOS issue: sometimes the approval button doesn't respond in Safari or on an iPhone. Use Chrome / Firefox / Edge to approve — a desktop computer is recommended.
After approval: return to Invoice Maven and issue a test invoice above the threshold. If the allocation number is printed on it — you're done! If not — wait another 5 minutes and try again, or see the common errors article.
Pro tip: save a screenshot of the final approval screen (in Step 3) — sometimes this is the only way to prove to support that you approved the permission, if something goes wrong later.
Additional resources
- Registering for the Israel Tax Authority's digital services — secapp.taxes.gov.il
- The official collection of instructional videos from the Israel Tax Authority
Frequently asked questions
Q: Does this also apply to "tax invoice-receipts"?
A: Yes. Any invoice reporting a transaction (tax invoice, tax invoice-receipt, credit invoice) above the threshold requires an allocation number.
Q: What about invoices to a non-profit organization?
A: They're also subject to this if the amount is above 5,000 ₪. The VAT logic still applies.
Q: What if I'm an exempt dealer (עוסק פטור)?
A: An exempt dealer doesn't issue a tax invoice — they issue a receipt. Receipts don't require an allocation number and aren't covered by this model.
Q: What if I issue an invoice in English?
A: The threshold and the allocation requirement are the same. The invoice can be in any language — the rule applies to the transaction, not the language.
Q: Does the Israel Tax Authority keep a record of my allocation requests?
A: Yes. Every request is saved in your portal at the Tax Authority. If there's an issue, you can see the history there.
Q: I'm getting error 406 when requesting an allocation number. What does that mean?
A: Error 406 = "no permission for this action." This almost always means you're a limited company or partnership that skipped steps 2 and 3 (granting and receiving permission for digital actions). Go back to Steps 2 and 3 on this page, complete the permission, and try issuing an invoice again. For a self-employed business (עוסק מורשה) or exempt dealer (עוסק פטור), Step 1 (personal identification) alone is enough.
Summary
This is the most advanced stage of the Israel Invoices model so far. From 1.6.2026, most business invoices will require an allocation number. Preparing in advance — registering for digital services and checking that your system is connected to the Tax Authority — will save a lot of headache the day after.
Practical tips:
- Don't wait until the last day — complete the digital registration now, even if the connection to the system isn't activated yet.
- Check once a month that your system is successfully receiving allocation numbers automatically. Connection issues are the most common cause of "stuck" invoices.
- Train your team — everyone who issues invoices needs to know about this requirement.
- Contact your accountant if there's any doubt or a recurring issue — they know how to handle it with the Tax Authority.
- For more information and support inquiries, contact us through our contact page.